How to Create Light Leak Photography – Plus 30 free preset overlays!
Discover the art of light leak photography with our beginner-friendly guide! Unleash creativity, explore step-by-step techniques, and illuminate your photos with enchanting warmth. Dive in now and learn how to add the light leak effect to your photography! Or get our free preset overlays for a one-click solution.
Scroll down this page to get our free Lightroom Presets.
Learn how to create light leaks on your photographs in Adobe Lightroom.
What Is Light Leak Photography?
In the world of digital photography, the fascination with light leaks is like discovering hidden treasures. It's about adding a dash of imperfection to your photos, creating a warm and authentic feel, just like the old days.
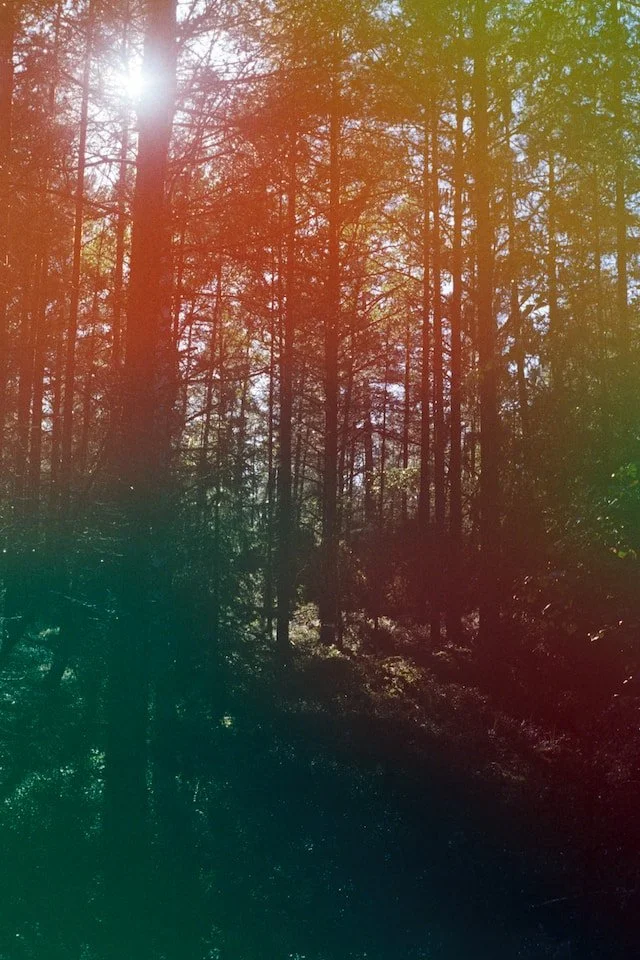
In recent years, photography has seen a delightful comeback of vintage vibes, and one exciting trend capturing hearts is the use of light leaks. But what are light leaks? Think of them as playful bursts of light that add a dreamy, nostalgic touch to your pictures. Light leaks in photography refer to the unintentional overexposure of film to light, causing artefacts or streaks of light to appear on the final photograph. While light leaks are often considered undesirable and a result of a flaw in the camera or film, they have also gained a certain aesthetic appeal.
Light leaks were more common in the early days of analogue photography when cameras and film were not as advanced as today. Vintage cameras were more susceptible to light leaks, particularly those with bellows or other parts that were not perfectly light-tight. Leaks could also occur during the film-loading process, due to faulty camera seals, or through other unintended openings in the camera body or film cassette. Later in the 20th Century, this effect grew more popular with the rise of the Holga camera and its distinctive image quality and the Lomography movement which embraced imperfections and randomness.
Vintage cameras would create light leaks on negatives when camera bodies were not completely light tight. Photo by Julius Drost on Unsplash
Lomography embraced the imperfect colour hues and light leaks. Photo by Scott Evans on Unsplash
Nowadays, you don't need to exclusively shoot in film to get this effect; it can be recreated in editing programs like Adobe Photoshop or Lightroom.
Whether you're a seasoned enthusiast or just starting, we'll delve into the resurgence of vintage aesthetics and walk you through a step-by-step tutorial tailored for beginners. Plus, we'll give you free light leak photography presets, making the creative process a breeze for those looking to add a touch of magic to their photos.
Light leaks originally occurred on negatives in analogue photography.
The popularity of light leaks has skyrocketed thanks to platforms like Instagram and Pinterest. Here's the fun part – you're not just a photographer; you're a trendsetter! Sharing your light leak-infused images on social media not only lets you showcase your creativity but also inspires others to join the fun. If you want to share yours with us here at TSOP, simply #theschoolofphotography and follow us on Instagram and Facebook.
Original image without light leak masks applied.
With light leaks added in Lightroom.
Get access to ALL our online courses - 1000’s of videos, worksheets, critiques of students work, personalised support and much more with our monthly membership.
Light Leak Photography Ideas
Alright, let's get practical. Light leaks can elevate different genres of photography, but what works best?
Captivating Portraits
Turn ordinary portraits into extraordinary stories. Expressive faces, natural poses, strong contrast or soft lighting – light leaks are a great way to add interest to your portraits.
Portrait of woman at golden hour.
Light leaks added to the portrait creates a vintage feel to the photograph.
The Great Outdoors:
No need to shoot in the golden hour when using the light leak effect. Light leaks add that extra sparkle to scenes anytime of the day.
Kluane National Park and Reserve, Canada. Photo by Kalen Emsley on Unsplash.
With light leak effect added. The yellow colour casts give an analogue feel.
Retro Vibes:
Transport your viewers to another era. Vintage cars, retro fashion, old antiques – light leaks effortlessly infuse your photos with a timeless charm.
Rusty truck in a field with a grey cloudy sky.
Light leaks add to the vintage feel of the rusty retro truck.
Here are just some of our best ideas but clearly you can add these effects to any photograph and one of the best things about being a photographer is to experiment. So, get out there and have fun experimenting with this effect.
How To Create Light Leaks
Now, let's talk tools. You can turn any photo into an example of light leak photography with Adobe Lightroom, Photoshop or other programs.
Using Light Leak Overlays in Photoshop and other programs
In Adobe Photoshop and any program that allows layers, you can use light leak overlays which you can layer on top of your original image. This can be a quick way of adding the light leak effect but can be less customisable and limits you to the effect given in the overlay.
Learn how to use Photoshop properly here.
Using Light Leak presets in Lightroom or Masking techniques
In Lightroom you can add light leaks to your photography with a single click by using presets. Don’t forget to grab our 30 free presets via the form above. Or you can use a selection of masks to simply and easily achieve the look you want.
Learn about Masking in Lightroom here.
Pros and cons of using Lightroom or Photoshop for adding the light leak effect
Photoshop
When creating the light leak effect in Adobe Photoshop, you can use a quick light leak overlay to get the effect, plus you can layer multiple for unique effects. However, an overlay doesn’t change the exposure and just adds the overlay on top of your image. If you wanted to bleach certain parts of your image, you’d need to use a variation of adjustment layers.
Lightroom
In Adobe Lightroom, not only can you apply a light leak preset with a single click, but you’re also able to bleach the image as you would a negative, without destroying the original file. It’s also easy to adjust and customise in the program, however, you’ll need to get to grips with Lightroom’s interface.
Creating Light Leaks In Lightroom
We’re going to take you through how to create this effect in Lightroom as we believe it’s the most effective and adaptable way to create light leak photography. This is also shown in the video tutorial above and again, don’t forget to download our presets for a one-click solution via the form above.
Step 1 - Import Your Image:
Let's start by importing your photos into Adobe Lightroom. Make sure you are organised and know where they’re going on your hard drive. Learn how to import into Lightroom properly here.
Step 2 - Basic Adjustments:
Head to the ‘Develop’ module, where the magic begins. Tweak exposure, contrast, and saturation to create a solid base for your photograph.
Step 3 - Masking:
In Lightroom, there are three different types of masks that you can use to create your light leak effects: ‘Radial Gradient’, ‘Linear Gradient’ and ‘Brush’. You can use the ‘Radial Gradient’ mask tool to draw circles or ovals where you want light leaks to be. You use the Linear gradient tool to create straight gradients coming in from the edges of the frame. You use the brush tool for freehand masks. This is your chance to get creative, and you can adjust the size, placement and feathering of each of the masks.
The most likely place light leaks from is the edge of the shutter, but if you want to mimic what happens to film when you quickly open the back of an SLR, you can use intersecting masks to create a light leak going through the photograph.
Step 4 - Fine-Tune Mask Settings:
Adjust the ‘Radial Gradient’ mask settings to gradually increase exposure. You can adjust the exposure to create the beached effect and the colour balance, you can use ‘Tint’ and ‘Hue’ tools to do this, to create the colour casts.
Step 5 - Harmonising Colours Through Grading:
Incorporating hues that occur in photographic film when creating colour casts for your filters can enhance the visual impact; try using cyan, magenta and yellow tones. Adjusting the ‘Temperature’, ‘Saturation’, and ‘Hue’ of your filters provides a nuanced palette. Additionally, utilize the ‘Colour Effect’ eyedropper tool to precisely select a colour for your cast.
Step 6 - Exploring The Variety of Light Leaks:
To achieve a dynamic and engaging effect, consider duplicating your masks. Experiment with diverse combinations of size, shape, and intensity. Get creative and keep adjusting the settings of the masks to bleach and tone different parts of the image.
Step 7 - Adding Final Touches and Export:
Elevate the vintage-film aesthetic by mimicking the characteristic of film grain found in analogue photography. You can also add vignettes to draw attention to the image. You can do this easily in the ‘Effects’ panel with the ‘Grain’ and ‘Vignette’ sliders.
Embrace the notion that perfection is not the goal – the essence lies in expressing your unique creative vision.
Once you’re happy with your light leak effect, toggle between the before and after views. Export your final image and share your light leak photography with the wider world. If you aspire to master Adobe Lightroom, consider exploring our dedicated course here.
The Light Leak Effect - Conclusion
For those who love shortcuts, we've got you covered – download our 30 free light leak presets by filling out the form above! No need to worry about complicated settings; these presets are designed to add that iconic, vintage look with just one click. Embrace the imperfections, celebrate the uniqueness, and let your creativity shine!
In conclusion, we hope that we’ve inspired you to explore the world of light leak photography. We've explored the resurgence of vintage aesthetics, identified moments for light leak overlays and effects, and provided a step-by-step adventure. Don't overlook the convenience of free light leak presets or overlays – a simple solution for adding enchantment with a click. Happy shooting!
Like this? - Check out more free tutorials below
I hope you liked this tutorial on light leak photography. If you did, please leave us a comment and support us by sharing it with your friends and subscribe to our newsletter at the bottom of this page for more.
We also have an excellent learning community on social media so please join us there as well.
Thanks for watching and remember – Learn more at The School of Photography.


