How to Put a Border Around an Image
Making your photography captivating is a powerful tool in today's digital world. Whether you're using images for social media posts, website displays, or other visual marketing materials, putting a border around an image can significantly elevate its impact.
In this tutorial I am going to teach you how to easily add a border around your image using a program called Photoshop. If you haven’t got Photoshop don’t worry, you can download a free trial by clicking here. Using Photoshop allows you to add drop shadows, signature logos, use different colours and be much more customizable with the borders you can produce. I’ve been doing this for years and I can tell you that if you want a quick, easy and customisable way to put a border around your photos, then Photoshop is the program to use.
So, download the free trial, go through this tutorial, and impress all your followers with unique borders around your images!
Why are borders around your images important?
Before we get into the how to add borders, let’s look at the why to do it.
Enhances Visibility: A border around an image can act as a frame, drawing the viewer's eye towards the central image. It creates a clear separation between the image and the surrounding content, making the image stand out and increasing its visibility.
Provides Breathing Space: A white border adds negative space around the image, giving it room to breathe. This can prevent the image from feeling cramped or cluttered and allows the viewer to fully appreciate the details and composition of the image.
Creates Contrast: The contrast between the border and the image can make the colors and details of the image pop, adding depth and dimension to the overall visual presentation. This can make the image more visually appealing and captivating to the viewer.
Enhances Consistency: If you're using multiple images in a social media post or a gallery display, adding a consistent white border to all of them can create a cohesive look and feel. This can help create a unified aesthetic and brand identity, making your visuals more memorable and professional-looking.
Boosts Branding: If you're using images for marketing purposes, adding a white border can provide an opportunity to incorporate your brand's color palette or logo. This can help reinforce your brand identity and make your visuals more recognizable and memorable to your audience.
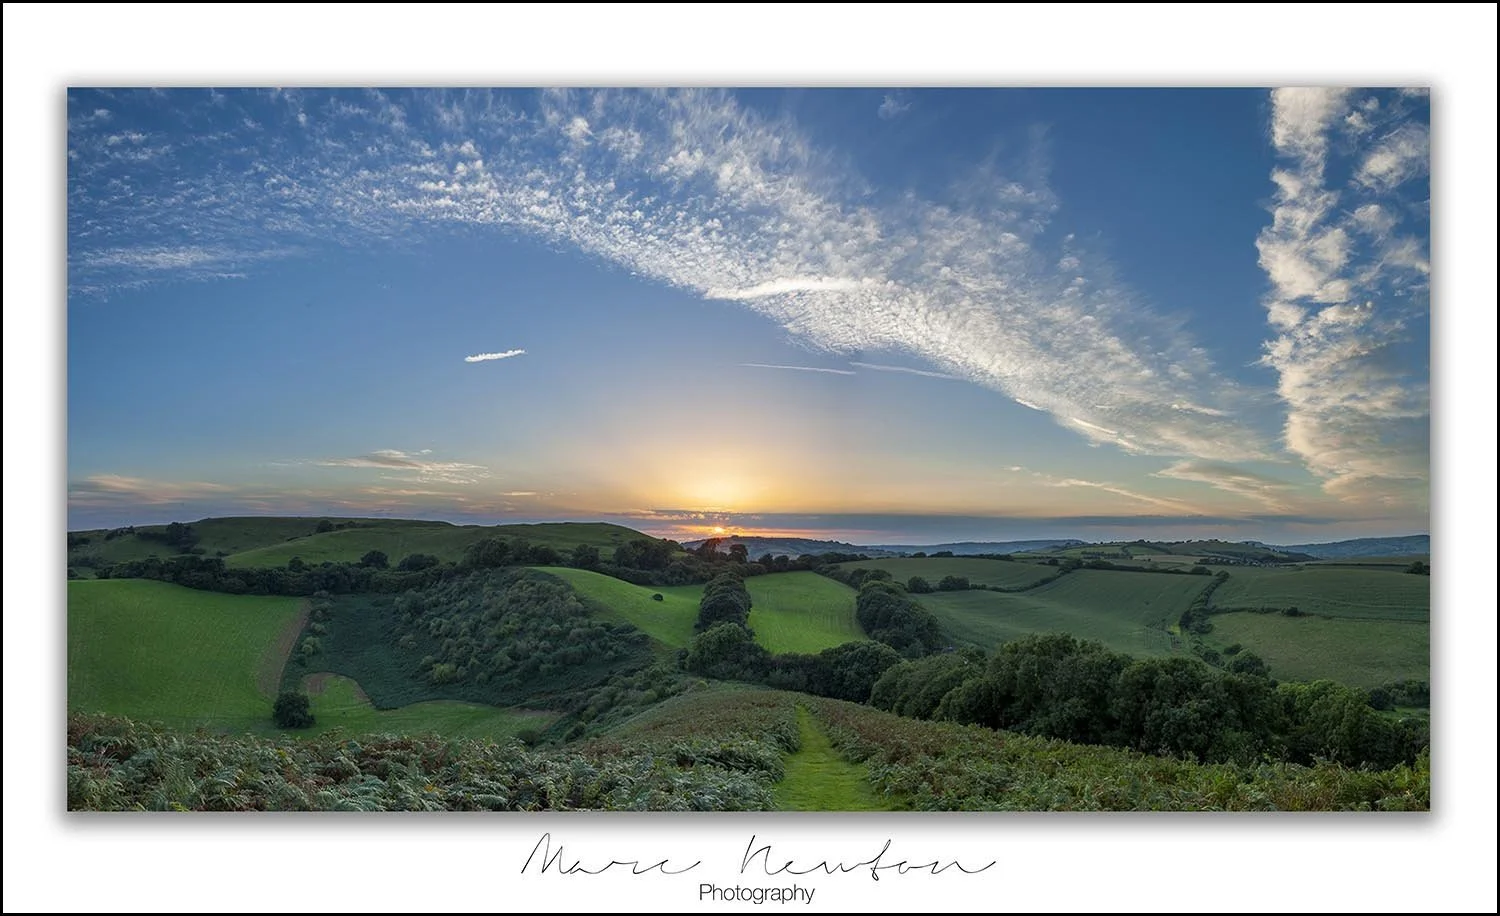
Image with branding in the border
From drawing attention to your images to creating a cohesive aesthetic, an image border can be a simple yet effective way to make your visuals stand out. Let's dive into the step-by-step process of creating a photo border and unlock the potential of this often-overlooked design technique!
Step 1: Open Image and Adjust size
It’s recommended to reduce the image size before posting on social media. This is to make it easier to upload and to avoid having your full resolution images held on websites where people can download them.
Go to File > Open > Find you image and open it.
Go to Image > Image Size.
Next to Resolution > Add 72 Pixels/Inch
Along the longest edge of your image (in my example below it is the width) add 2000 Pixels
Tick Resample: Automatic
Click OK to apply the changes.
How to Protect your Images online
Learn about resolution in photography here
Changing size of image in Photoshop
Step 2: Unlock the Background Layer
In the Layers panel, you'll notice that the image is on the Background layer. We need to unlock this layer so we can add other layers below it. To unlock it, simply click on the lock icon. If you're using CS6 or earlier, you can double-click on the layer. This will remove the lock icon and rename the layer to "Layer 0".
Locked Layer
Unlocked layer
Get access to ALL our online courses - 1000’s of videos, worksheets, critiques of students work, personalised support and much more with our monthly membership.
Step 3: Add an edge around your image
Next, we need to add an edge to the image which will become our border. In my example I add a 200px border. If you want a bigger border simply increase that number or, for a smaller border, reduce it.
Go to Image > Canvas Size.
Make sure Relative is ticked.
Click the centre of the Anchor box so the dot is in the middle square.
Put 200 Pixels in the width and height.
Click OK to apply the changes.
Canvas size settings in Photoshop
Image with increased canvas size ready to fill with colour of your choice
Step 4: Add Solid Colour Fill Layer
Now we can fill the border with a colour. In my example I use the colour white.
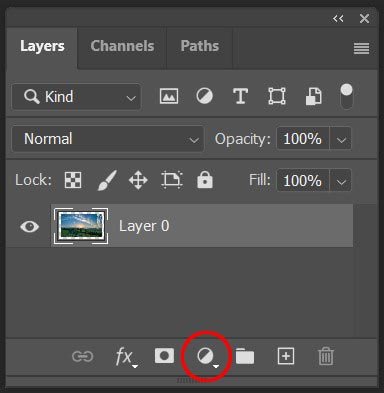
At the bottom of the Layers panel click the Adjustment Layer.
Adjustment layer Icon at the bottom of the panel
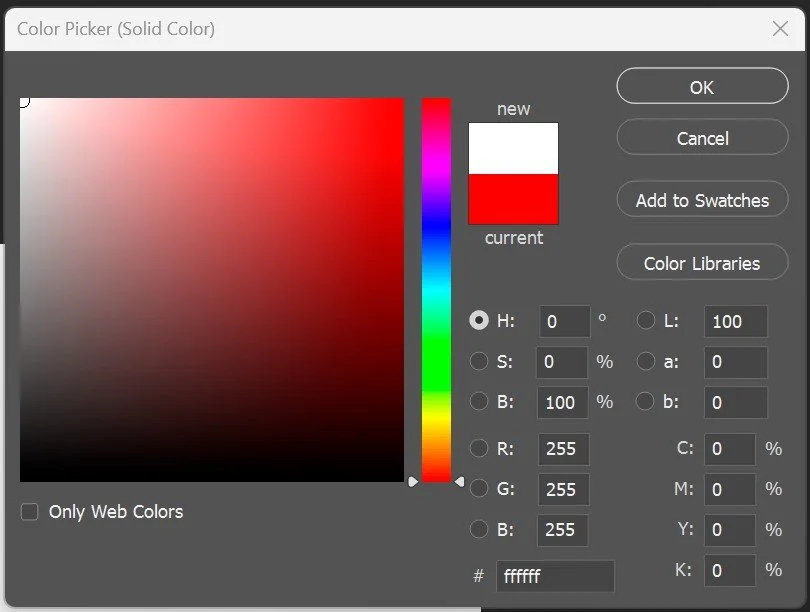
Choose Solid Colour from the list.
Select the colour you want your border to be > Click Ok
Solid colour fill panel
Drag your colour fill layer to the bottom in the Layers Panel.
Colour fill dragged to the bottom of layers
Step 5: Save your image
Then you need to save your image as a jpeg so it can be shared all over the web!
Go to File > Save as a Copy.
In the drop-down box, select Jpeg.
Rename your file and chose a location to save it > Click Save.
In the Jpeg option box > Type 8 in quality > Click OK. NB you will not save over the original as long as you rename the file.
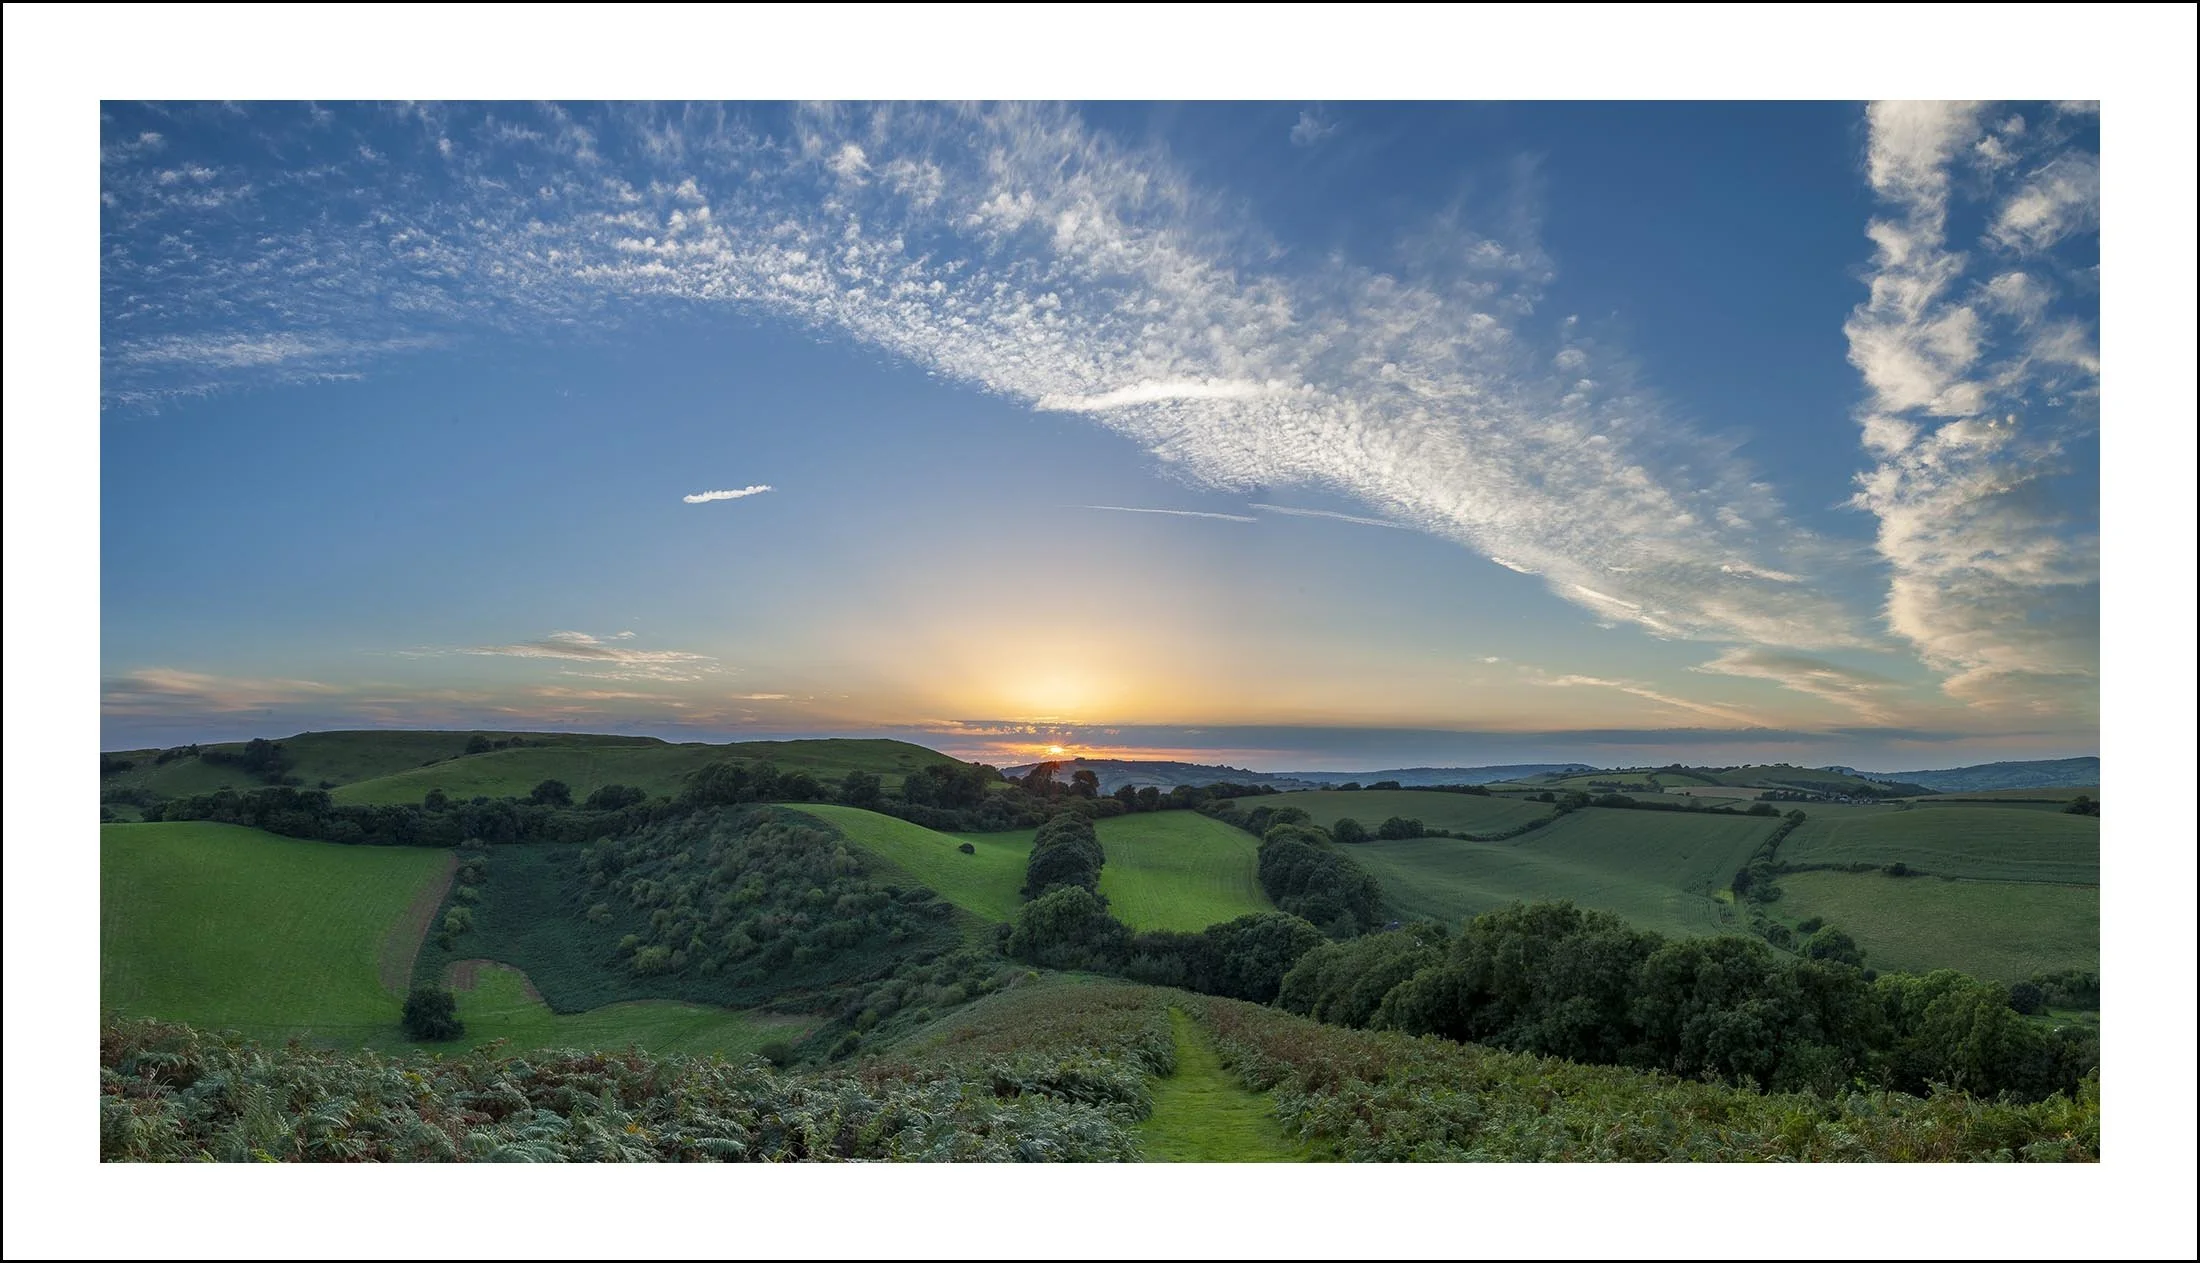
Final image with a border
Conclusion
That's it! You have successfully created a photo border in Photoshop. But it doesn’t end there. There are many other options to customise your border and make it unique. You can add a signature logo to your image, add a drop shadow, border edge and much more. Please see our examples below:
Square crop example, with border, drop shadow and signature logo on the image
Example with branding within white border
Portrait example with a white border and drop shadow
Black and white example with border, drop shadow and signature logo at the top of image.
To lean how to use Photoshop to customise your borders click here
Like this? - Check out free tutorials below
I hope you liked this tutorial on putting a border around an image. If you did, please leave us a comment and support us by sharing it with your friends and subscribe to our newsletter at the bottom of this page for more.
We also have an excellent learning community on social media so please join us there as well.
Thanks for watching and remember – Learn more at The School of Photography.


