Double exposure photography – Ideas and Techniques
Want to be extra creative with your photography? Then Double Exposure Photography is something to try. A double exposure is when you expose a single frame more than once, resulting in a layered photograph combining two scenes. It’s a great way to explore photography and stretch the creative mind. In this blog, we’ll give you loads of ideas show you the best techniques and tell you the different ways to create great double exposure photography!
What Is A Double Exposure?
A double exposure is created by exposing a single frame (film or a digital sensor) to two different images. Traditionally, you’d achieve this effect with film cameras, but this technique is now accessible to digital photographers through in-camera settings or via post-processing software like Photoshop.
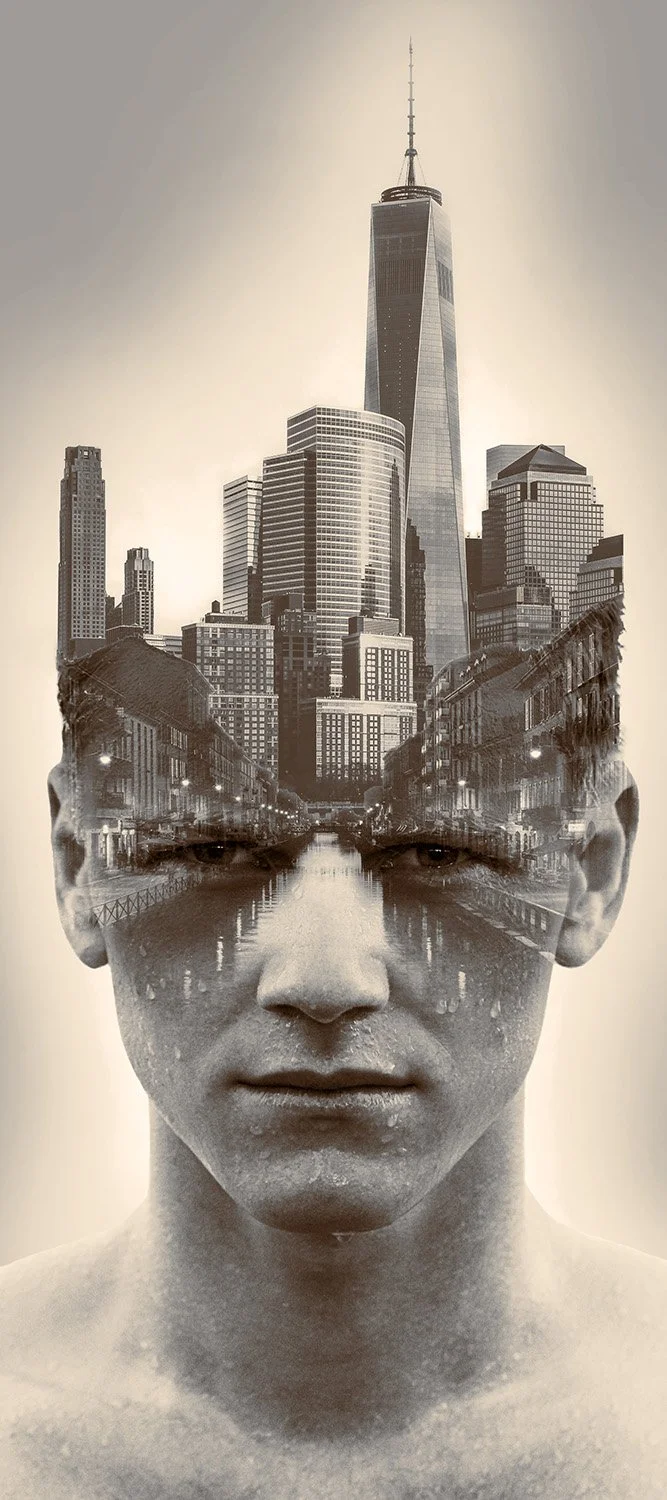
Double exposure photography allows you to juxtapose contrasting scenes, textures, or subjects, resulting in images that can spark curiosity, ignite the imagination or tell a poignant message.

Credit: Imani Bahati on Unsplash.
Credit: Kamila Maciejewska on Unsplash

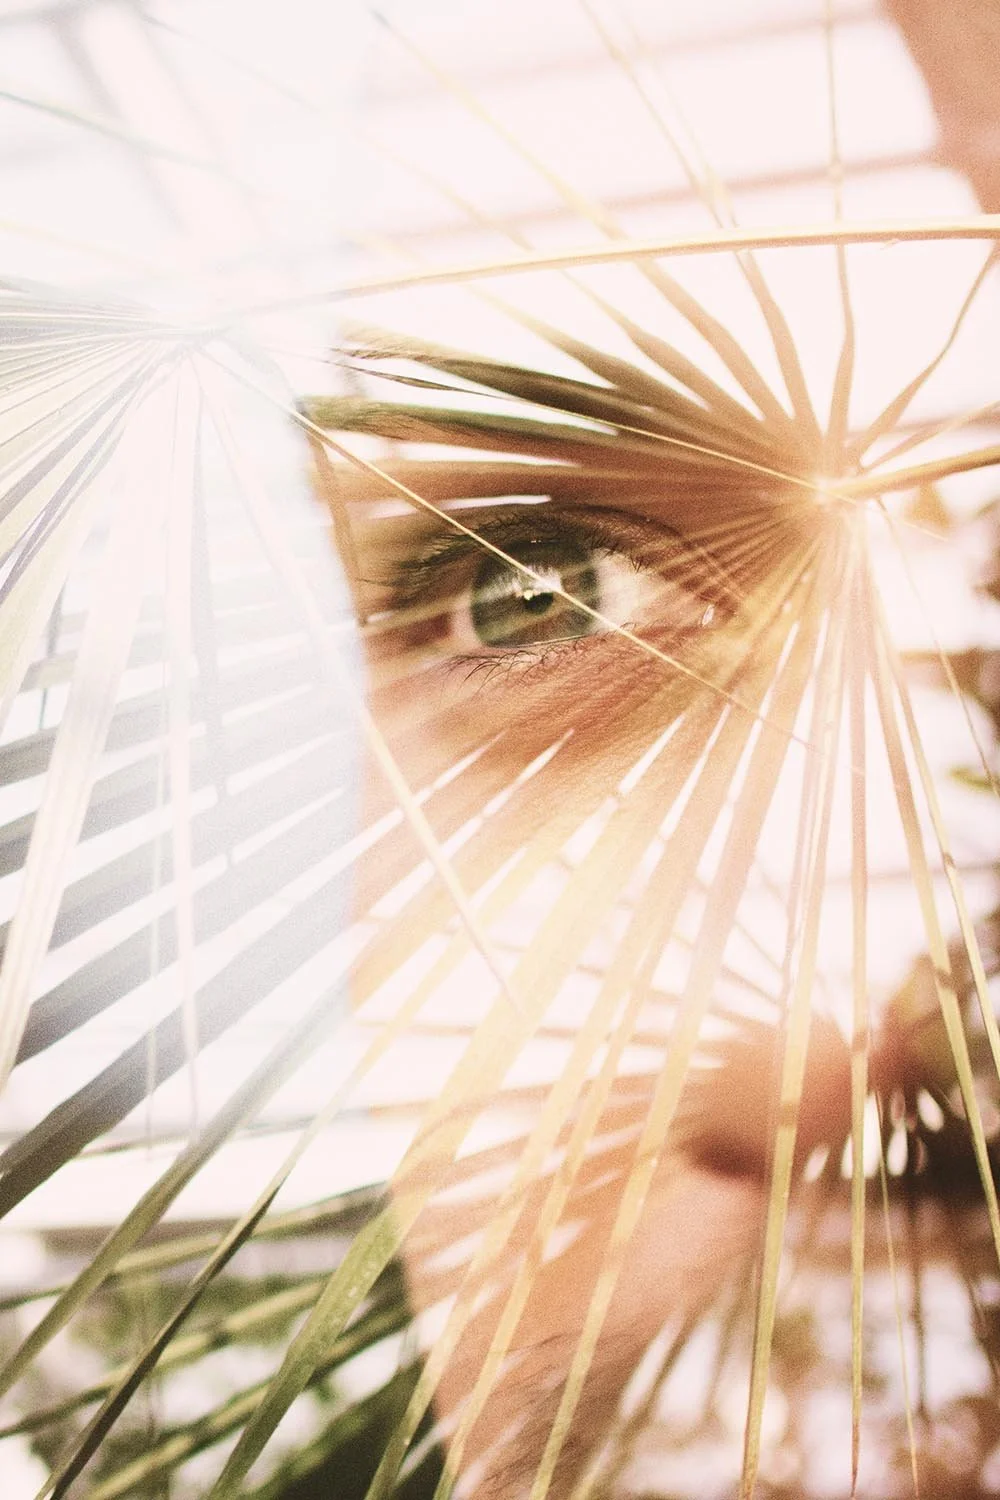
Credit: Elijah Hiett on Unsplash
The History Of Double Exposure:
The Victorian Era (1800s):
The earliest forms of double exposure emerged in the mid-19th century, as photographers experimented with exposing a single plate or film multiple times. This was often used for "spirit photography," where ghostly figures were added onto portraits.

Spirit photography by William H Mulmer
Surrealism and Art (Early 1900s):
In the early 20th century, artists like Man Ray and László Moholy-Nagy embraced double exposure as a tool for expressing surrealist ideas. They used it to create dreamlike imagery and challenge the boundaries of traditional photography.

Man Ray. Muriel Levy. 1945

Wanda Walz. Exercise. 1932
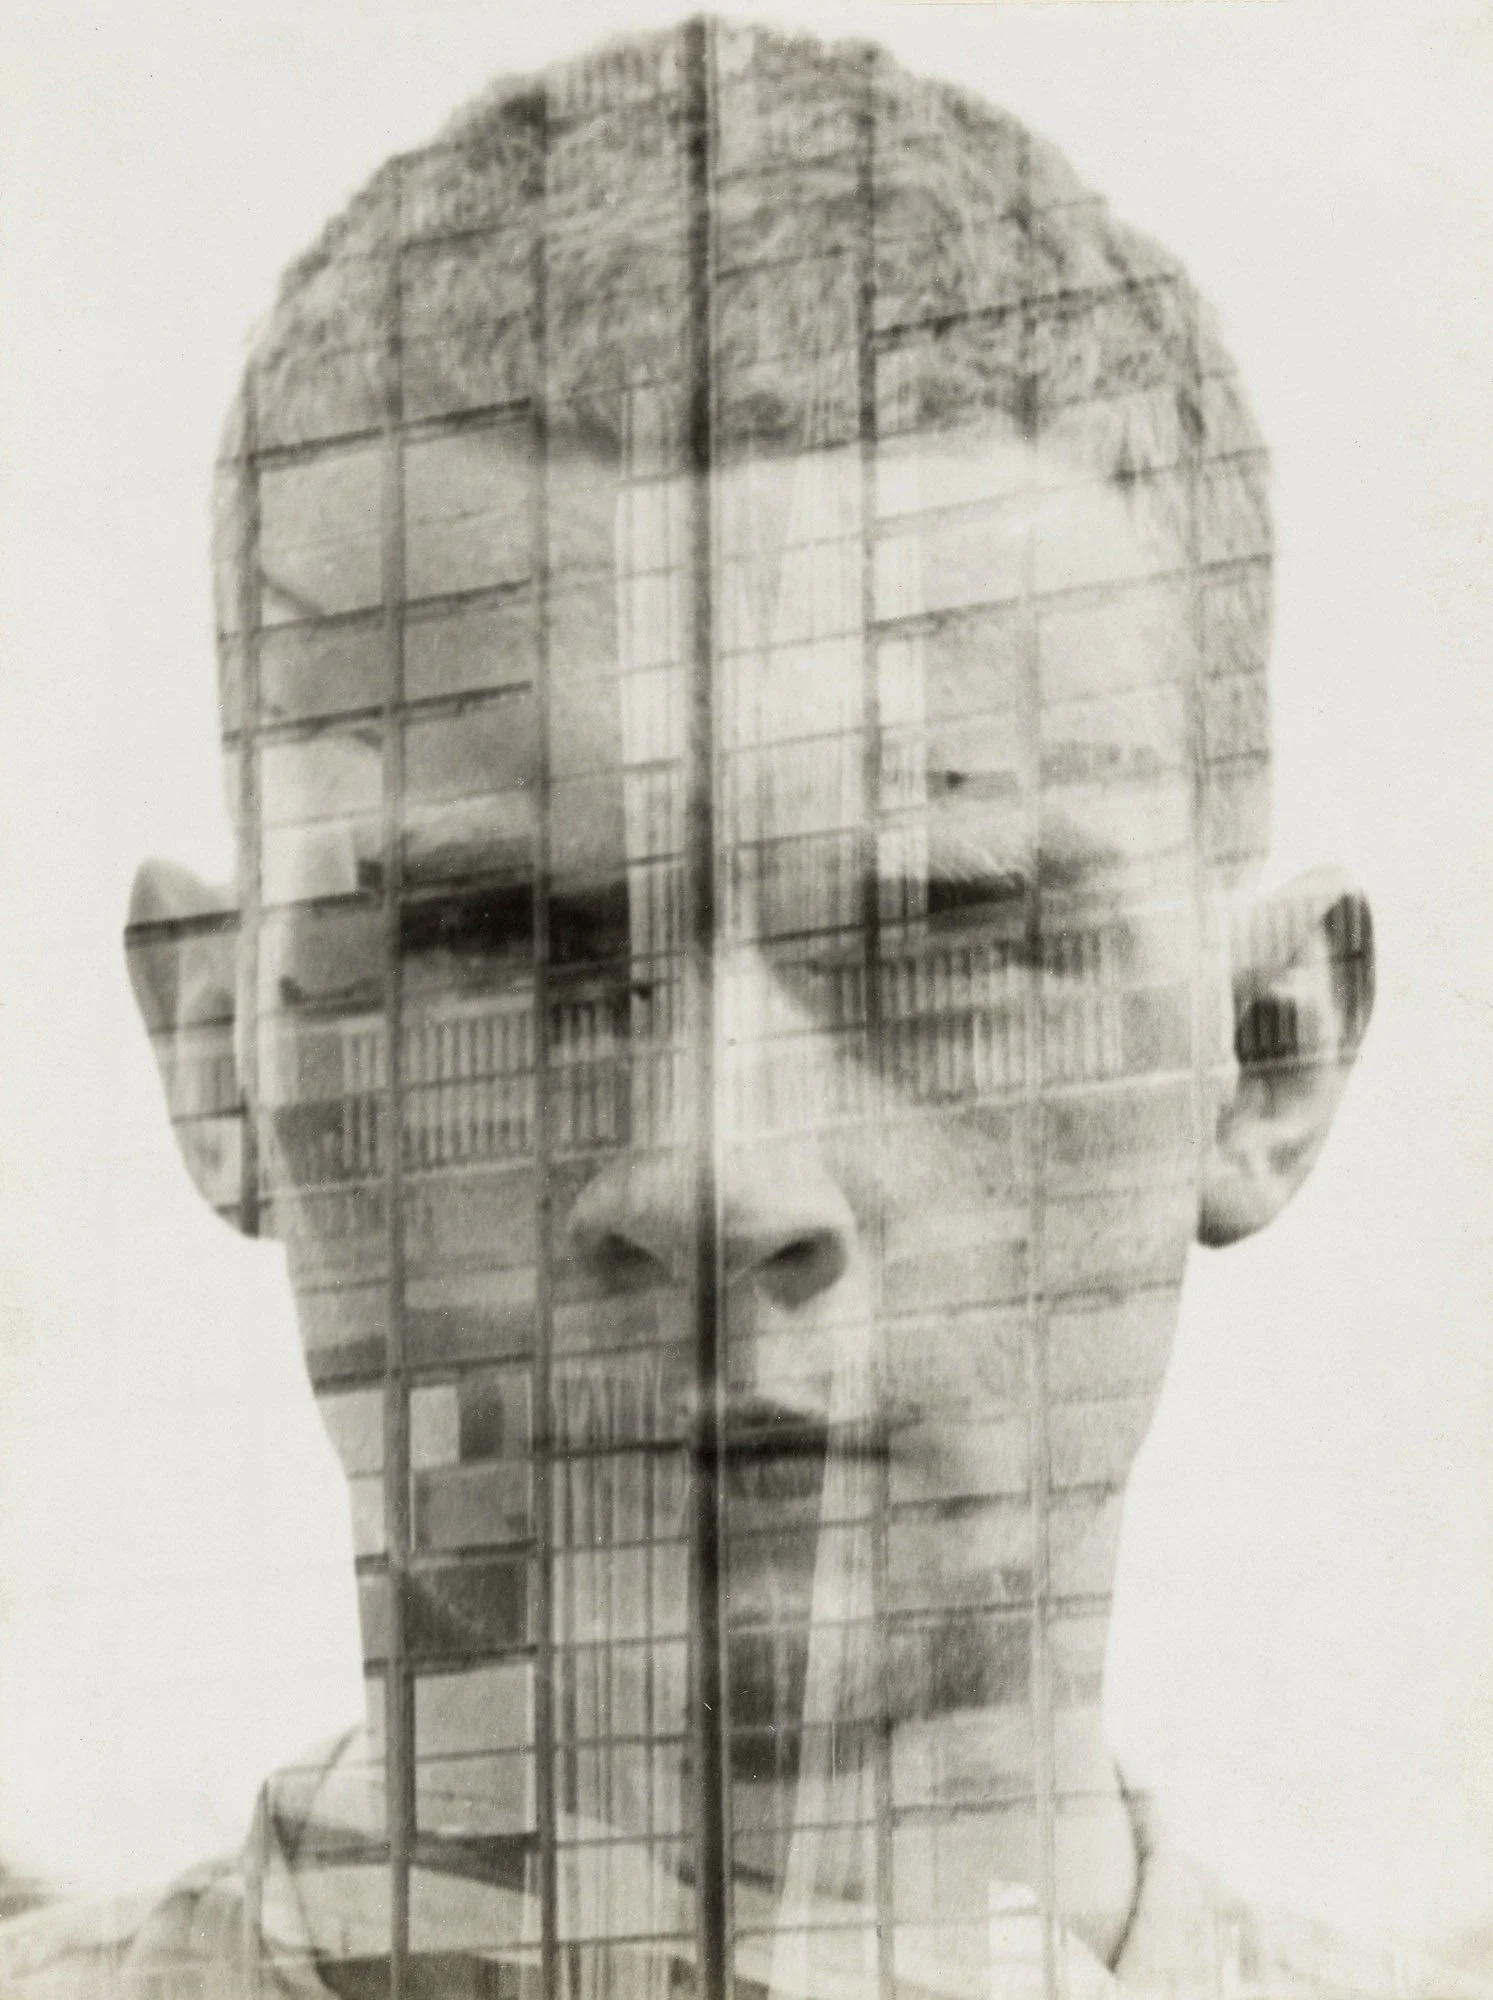
Hajo Rose. Self Portrait. 1931
Commercial and Artistic Use (Mid-Late 1900s):
Double exposure found its way into advertising, film and album covers in the mid-20th century, adding a touch of mystique to visual storytelling.


The Digital Age (2000s-Present):
With the rise of digital photography, creating double exposures became more accessible than ever. In-camera features and editing software made it easier for both professionals and amateurs to experiment with this technique, leading to a resurgence of its popularity. Today, it's a reminder that photography is not just about capturing reality, but also about transforming and reimagining it.

The Martian movie poster

Twin Peaks posters
Get access to ALL our online courses - 1000’s of videos, worksheets, critiques of members work, personalised support and much more with our monthly membership.
Techniques for creating double exposures
Technique 1 - In-camera double exposure (digital cameras)
Many modern digital cameras offer built-in multiple exposure modes. Experiment with different combinations of images to find the perfect blend.
Method:
Find the Setting: Look for a "Multiple Exposure" or "Overlay" mode in your camera's menu. This might be under a creative mode or shooting menu section.
Choose Your Images: Select two images you want to blend. You can either take them on the spot or use pre-existing photos from your camera roll.
Set the Blending Mode: Some cameras offer different blending modes like "Additive," "Average," "Lighten," or "Darken." Experiment to see which one gives you the desired effect. Below is a guide to the effect of the different exposure blend modes you may find on your camera:

A guide to the blend modes you may find on your camera.
Adjust Parameters: Some cameras allow you to control the exposure compensation and order of the images (which one is layered on top).
Take the Pictures! Press the shutter button, and your camera will automatically combine the images into a single exposure.

Double exposure photography in Covent Garden, London.

Double exposure photography in London to convey a message

Double exposure photography in London
Technique 2 - Post-processing software
Editing software like Photoshop or GIMP allows for precise control over the blending process. You can adjust the opacity of the images, refine them with layer masks, and use blending modes to achieve the desired effect.
Method:
Choose Your Software: Photoshop, GIMP, and other photo editing software offer tools for creating double exposures.
Open Your Images: Open the two images you want to blend as separate layers in your chosen software.
Experiment with Blending Modes: On the top layer, explore different blend modes. We recommend the blend modes - "Overlay," "Screen," "Soft Light," or "Multiply". Below is a guide to the effect these blend modes will have on your exposures.

A guide to the blend modes we recommend using in Photoshop when creating double exposure photography.
Refine with Layer Masks: Use layer masks to selectively hide or reveal parts of each image, allowing for greater control over the blending.
Adjust Opacity: Fine-tune the transparency of each layer to achieve the desired level of visibility for each image.
Additional Tools: Experiment with other tools like "Gradient Tool," "Brush Tool," or "Eraser Tool" to create unique effects.
For a full tutorial on blending multiple exposures in Photoshop, click here.


Technique 3 - Film photography
Let’s go old school!! If you're a film enthusiast, embrace the serendipity of analogue double exposure photography. Load your camera with a roll of film and expose it twice to different scenes. You can’t instantly see the results and that’s part of what makes double exposures on film so exciting. Snap those two exposures, send the film of processing and await the magic to drop through your letter box!
Method:
Multiple Exposure Function: If your film camera has a multiple exposure function, you can expose the same frame of film twice. Be sure to take the correct number of exposures on one frame. You can expose more than twice onto one negative, but we recommend you do start by doing just two.
Rewinding Film: For cameras without a multiple exposure function, you can rewind the film after the first exposure and shoot the roll again. This requires careful manual rewinding and frame counting. Practice makes perfect here!
Exposure Considerations: Since you're exposing the film twice, you generally need to half the exposure for each shot to avoid overexposure in the final image. For example, if a correct exposure for a scene required 1/500th second, you would want to shoot each exposure at 1/1000th second halving the exposure time. For an easy ride, a good average is to under expose each picture by 2 stops.

Credit: Annie Spratt on Unsplash.

Credit: Weston M on Unsplash
Tips for stunning double exposures
Contrast is Key: Choose images with contrasting elements, such as a silhouette against a busy background, to create visual interest. Consider the light and dark areas of each scene and how they’ll intersect.
Mindful Composition: Plan your shots thoughtfully, considering how the two images will interact and complement each other.
Experiment with different Subjects: Portraits, landscapes, still life, and architecture can all be transformed through double exposure.
Play with Light and Shadow: Utilize light and shadow to add depth and dimension to your double exposures.
Embrace the Unexpected: Don't be afraid to experiment and embrace happy accidents. Some of the most captivating double exposures are born from unexpected combinations.
Keep to a theme: Harmonise your double exposures by giving them a theme. This could be two scenes from the same place overlayed, the same person in two different positions etc.

Credit: Branislav Rodma on Unsplash.

Credit: Jonathan Borba on Unsplash

Credit: Majestic Lukas on Unsplash

Credit: Annie Spratt on Unsplash

Credit: Ian Keefe on Unsplash

Credit: Teena Lalawat on Unsplash
Getting Inspiration for double exposure photography
Double exposures in photography have been embraced by artists, designers, musicians, and filmmakers alike. Look to photographers like Man Ray and Jerry Ulsemann for photography inspiration.
Explore the use of double exposures in album covers such as Pink Floyd’s Piper At The Gates Of Dawn, and movie posters like The Girl With The Dragon Tattoo to see how this technique has been used to create iconic visuals.

Pink Floyd Piper At The Gates Of Dawn album Cover

The Girl With The Dragon Tattoo move poster.
Conclusion
Double exposure photography invites you to step outside the boundaries of conventional photography. It's a playground for experimentation and a canvas for your imagination. Embrace the challenge, explore different techniques, and discover the magic that lies within layered realities.
Trying this technique out in the busy markets of Covent Garden was certainly a bit of a learning experience, but incredibly fun! The one thing that stood out more than anything, is that this technique is definitely not as easy as you think. Here's three lessons we learned while giving it a go:
Framing your double exposure shots: When your first photo is a framing element, such as a doorway or window, it works really well when you use this composition to overlay a portrait or subject photograph. This double exposure technique is somewhat of a different spin on the "frame within a frame" composition style. You can learn more about using Frame within a Frame in our full tutorial here.
Dark Subjects: Another thing we found was that if you're trying to expose two frames of dark objects, it doesn't overlay very well. We were using "Additive" mode on the Fuji X-T5, so it could still be a good idea to experiment with this on other bending mode settings on your camera as you may get a different result.
Artistic concept is key: Finally, the most important thing that becomes apparent when experimenting with double exposure photography is the 'idea' of the photo is what makes it a great double exposure photograph. The first image that was taken in the tutorial video above stands out because of the intention behind it: To show the bustling energy of Covent Garden in London.
We hope that this has inspired you to give double-exposure photography a go!
Check out these tutorials below


I hope you liked this blog ‘a beginner’s guide to forest photography’, if you did, please leave us a comment, and support us by sharing it with your friends and subscribe to our newsletter at the bottom of this page for more.
We also have an excellent learning community on social media so please join us there as well.
Thanks for watching and remember – Learn more at The School of Photography.
