Forest Photography For Beginners: A Complete Guide to Woodland Photography
Have you ever wandered through a sun-dappled forest and wished you could capture that beauty via your camera? Forest photography is a captivating genre, but it can be intimidating for beginners. That's where this guide comes in! We'll walk you through everything you need to know to take stunning forest photos, from choosing the right gear to mastering composition and editing techniques. Plus, we're throwing in a set of 33 free forest photography Lightroom presets to help you enhance your images and achieve that dreamy forest look.
For beginners just starting out, mastering the foundations of photography can make learning forest photography much easier — learn more in our beginners photography tutorial.
Free forest photography presets

Get 33 Forest Photography FREE when you fill in the form below!
Get access to ALL our online courses - 1000’s of videos, worksheets, critiques of members work, personalised support and much more with our monthly membership.
Why Forest Photography Is Challenging (and Rewarding)
Photographing the forest is one of the best ways to capture the beauty of the natural world. Forests are incredibly diverse in terms of both flora and fauna and offer a large variation of lighting situations which can generate atmosphere and intrigue to your images. The interplay of light and shadow, the textures of bark and moss, the vibrant colours of wildflowers – all these elements combine to create endless possibilities for breathtaking woodland pictures. But forest photography has its challenges. It’s extremely hard to see the forest through the trees and that together with low light situations and unpredictable weather can catch out the unprepared beginner. But don’t worry, this full beginner guide will help you take amazing forest photos.
Essential Gear for Forest Photography Beginners
Camera

Canon EOS Rebel T7
We recommend a DSLR, mirrorless or Bridge camera that you can have full manual control of and interchangeable lenses. But if you’re just shooting with your phone or a compact, that’s fine too. A lot of the advice we give you in this guide can apply, no matter what you’re shooting with!
If you’re looking for a comprehensive guide to equipment, read our beginner photography equipment guide.
Lenses
We say the best camera is the one you’ve got, and you can apply to lenses too! Don’t let not having all the fancy gear hold you back from trying forest photography.
Kit lens: Your standard zoom lens will work fine for this – anything else is just nice to have, so don’t worry about going out and spending thousands on glass. It’s a very versatile lens, so is great if you’re a beginner.
Nice to have:
These recommendations are largely dependent on what you plan on shooting in the forest and are non-essential to capturing forest photography, we just think they’d make a great addition to your kit bag!
Wide-angle lens (14-24mm): Ideal for capturing expansive forest landscapes and emphasizing the scale of towering trees.
Macro lens (90-105mm): Perfect for your venturing into the macro side of things. You’ll be able to get close-up shots and show intricate details and textures.
Telephoto (70-200mm): Great if you’re going to aim to capture across huge distances in the forest – the long focal length will enable you to get shots into the tree canopy.

Canon 15-35mm wide angle lens.

Canon 100-400mm telephoto lens.

Canon 100mm macro lens.

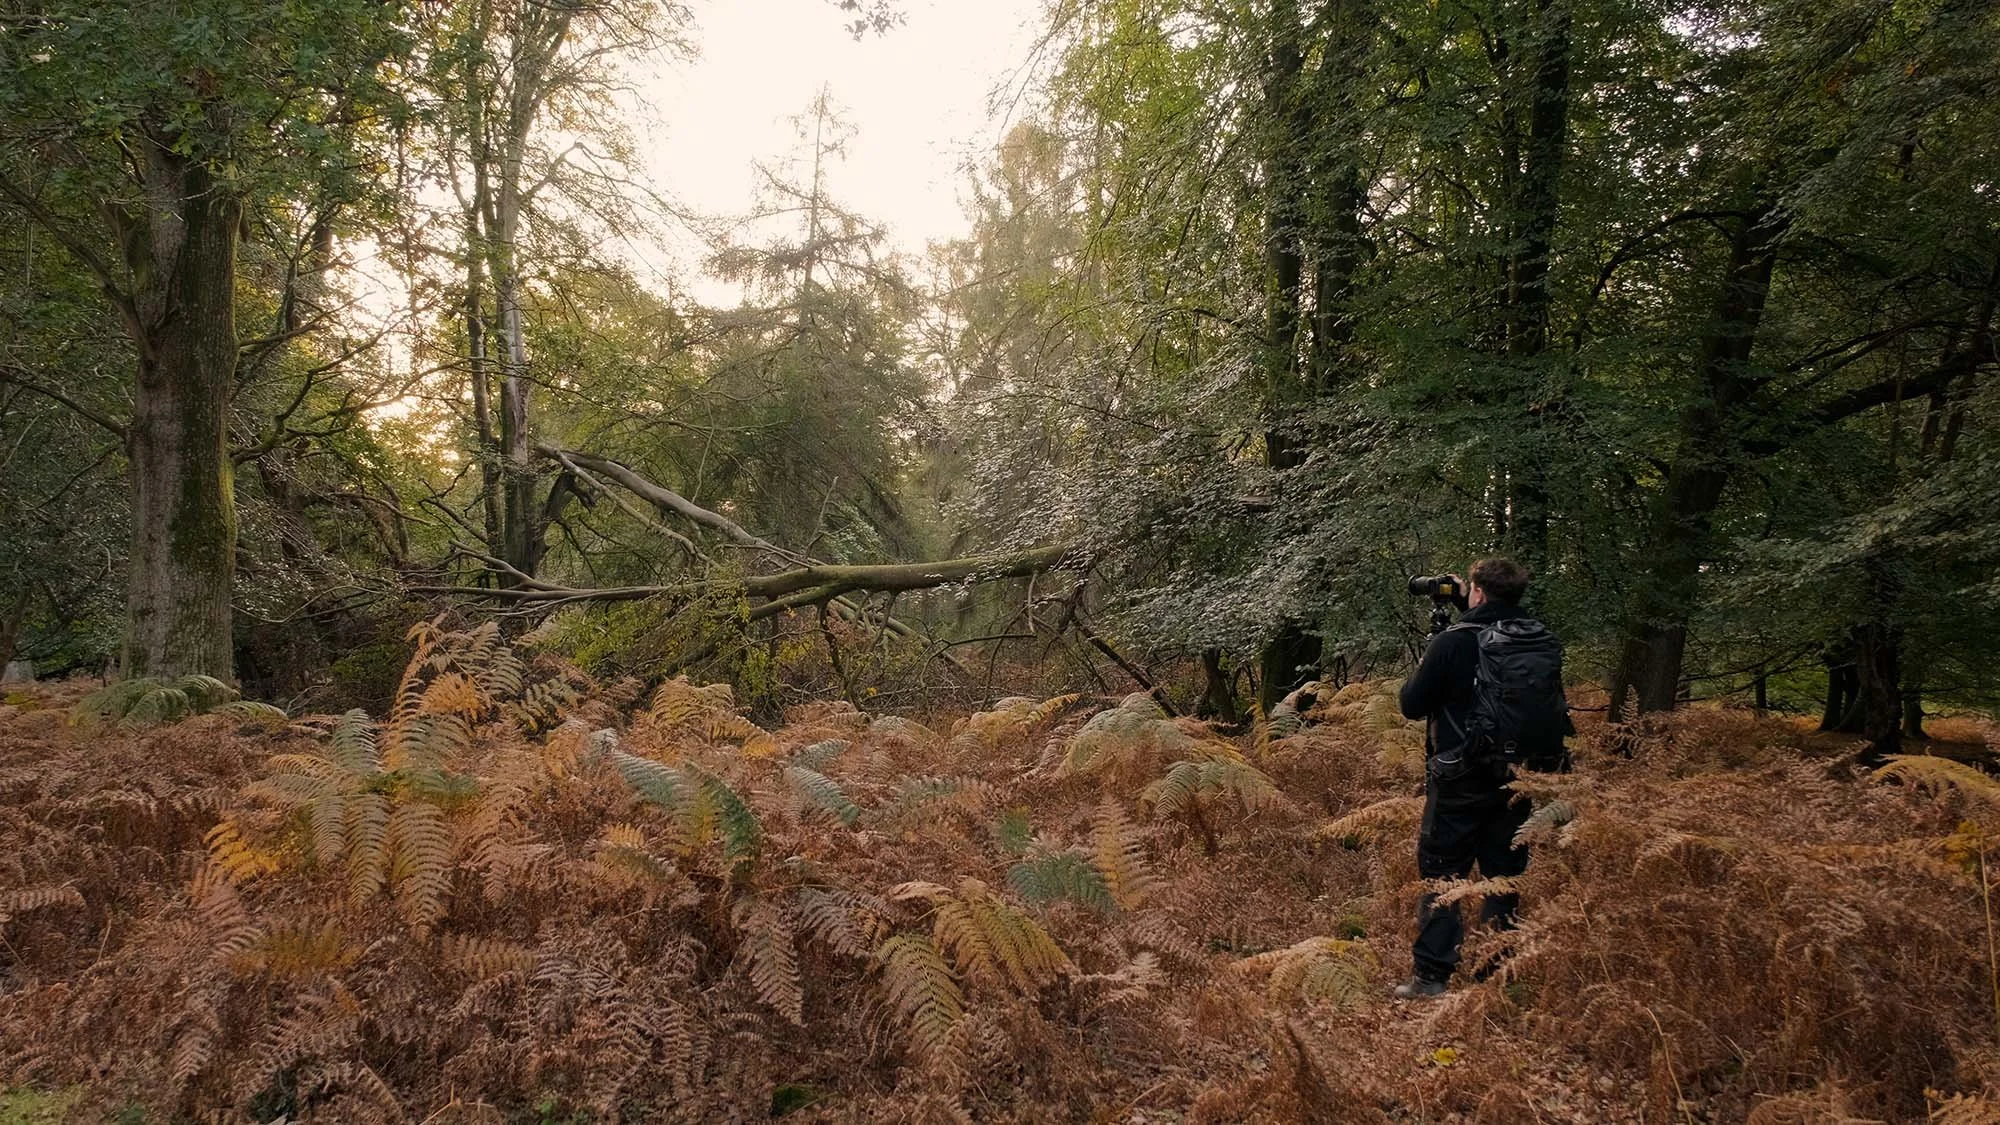
Pro Photographer Jack Lodge using a tripod in his forest photography course, where he explains the equipment he uses in woodland photography.
Tripod:
A sturdy tripod is crucial for sharp images, especially in low-light conditions where you'll need to use slower shutter speeds.
Filters
Polarizing filter: Reduces glare and reflections on leaves as they tend to reflect the sunlight (even in overcast situations!). It’s help enhance and even out your colours too.

Forest photography comparison showing effect of polarising filter on tree bark

Learn how ND filters improve long exposure forest photography in our complete ND filter guide.

ND Filters are great to slow down shutter speeds when photographing moving water. © Jack Lodge - taken from our Forest Photography Course.
Other Essentials:
Extra batteries and memory cards: Forest photography sessions can be long, so be prepared.
Rain cover: Protect your gear from unexpected showers.
Comfortable hiking boots and clothing: You'll be doing a lot of walking, so dress appropriately for the weather and terrain.

Extra batteries and memory cards.

Waterproof bag for rainy weather.

Hiking boots for forest terrain
Technical Tips & Techniques
Understanding Light
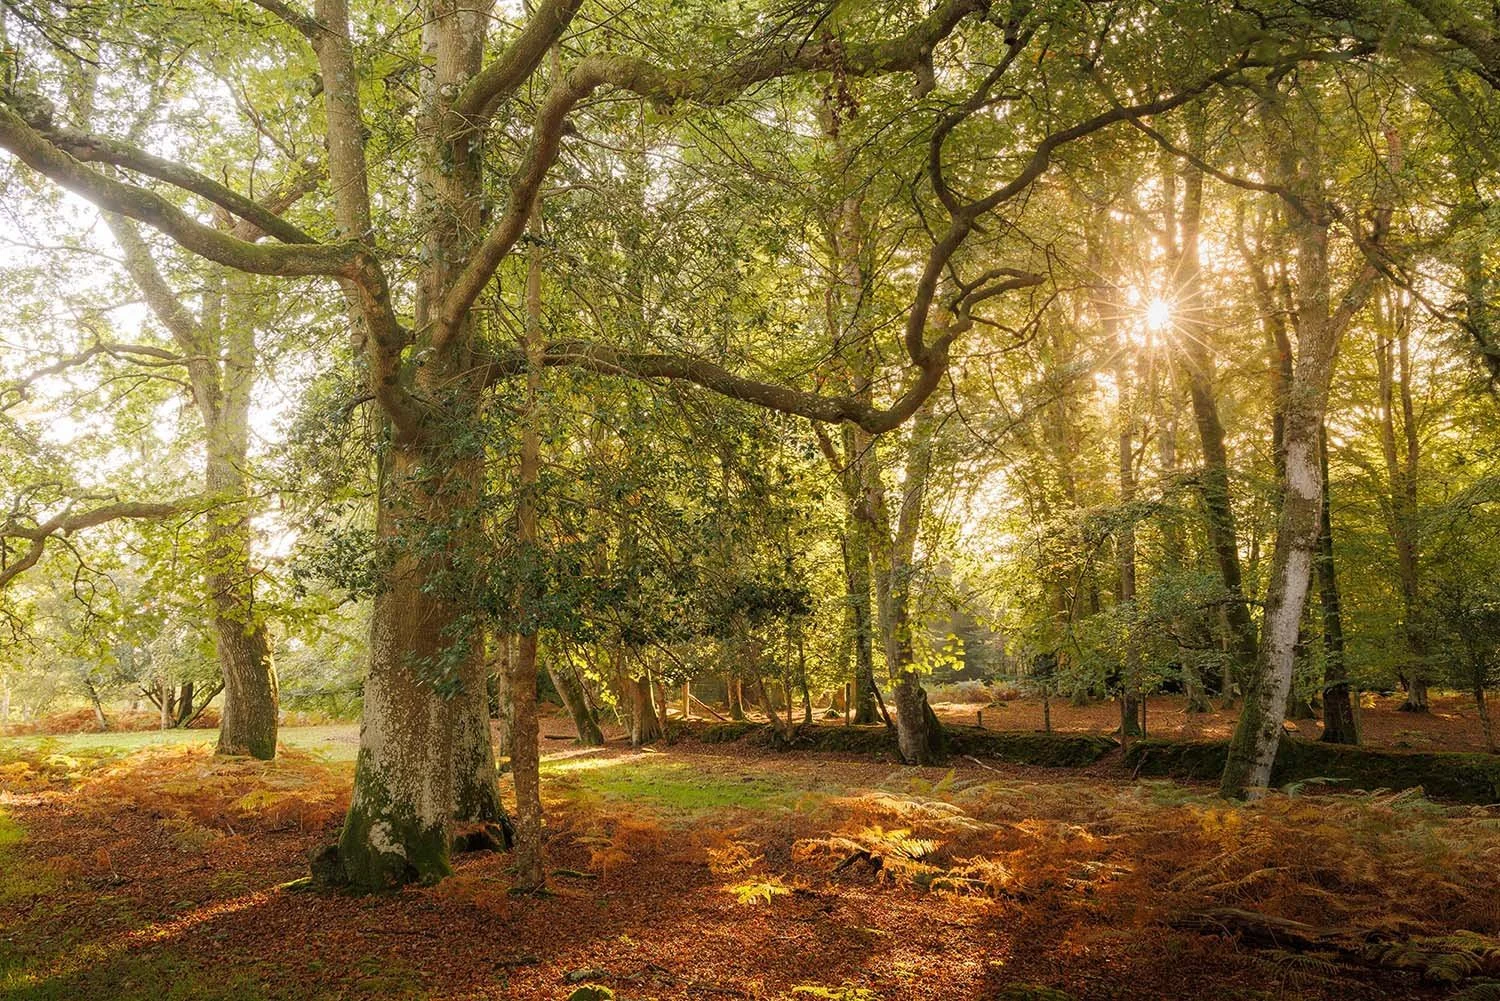
Golden Hour: The hour after sunrise and the hour before sunset offer the most magical light for forest photography. The warm, soft light creates a beautiful glow and long shadows that add depth and dimension to your images.
Overcast Days: Don't shy away from cloudy days! The diffused light can be perfect for capturing even lighting and vibrant colours in the forest.
Backlighting: Shooting towards a light source can create dramatic silhouettes and sunbursts - Watch how to create sunbursts and silhouettes in forest photography using backlighting in the video above.

© Jack Lodge. Cloudy and overcast days can be great for forest photography. Taken from our Forest Photography Course.

© Jack Lodge. Backlighting the forest can result in brilliant results. Taken from our Forest Photography Course.

© Jack Lodge. Golden hour is a go-to for all genres of photography, and forest photography is no different! Taken from our Forest Photography Course.
Forest Photography Composition Techniques
Great composition is the backbone of any genre — from forests to portraits. Check out general photography tips for beginners and creative photography ideas to inspire your shoots for more inspiration.
If you want even more creative direction, explore different genres in our introduction to key photography genres guide.
Rule of Thirds: Divide your frame into thirds both horizontally and vertically and place your subject along these lines or at their intersections. This creates a visually appealing composition that leads your eye around the image easily.
Leading Lines: Use natural elements like paths, rivers, or fallen logs to guide the viewer's eye through the photo, creating a sense of distance and depth within a scene.
Frame within a frame: Use branches, foliage, or other natural elements to frame your subject and create a sense of depth.
Rule of odds: Odd numbers in your composition give a more random or natural feel to your forest photography. You can do this by having an odd number of trees or branches in your frame as it helps show the asymmetrical nature of the forest.

© Jack Lodge. Frame the focus point of your forest photograph with foliage to emphasise the focus point.

© Jack Lodge. Use the rule of odds to show the chaotic nature of the woodland.

Leading lines help draw the eye into the photograph and can help give an idea of distance.

Use the Rule of Thirds to create a balanced image.
Example images taken from our Forest Photography Course.
Best Camera Settings for Forest Photography
Aperture: This depends on the area you’re shooting and the kind of depth of field that you want. If you want your shot to have a shallow depth of field, use a larger aperture. Alternatively, if you want to capture more detail, use a smaller aperture. For forest photography, we suggest using around F11 for a longer depth of field and around f/5.6 for a shallower depth of field.
Shutter Speed: Again, this is going to be very dependent on the shooting conditions! For those crisp shots, you’re going to want a speed of around 1/250th second, but a well-exposed shot is your main priority. If the wind is moving the branches of the trees too much, you can always slow down your shutter and lean into the motion blur effect.
ISO: Traditionally, you’d want your ISO as low as possible, for woodland photography you adjust your ISO to the conditions you’re shooting in, what matters most is getting a well-exposed photo. With today’s DSLR technology, shooting a higher ISO is not as much of an issue, so don’t be afraid to push it up if you need to!
White Balance: When you’re shooting in RAW, you can adjust your white balance when you’re editing your forest photography, but it’s always best to try and get this done right in camera first. You can use the white balance creatively to create an atmosphere in a forest photography image. Set your white balance to cloudy to emphasise warming the scene or set it to daylight to emphasise the bluer tones for a colder-looking scene.
Not sure about camera settings? Enrol in our beginner photography course to master exposure and settings.
Forest Photography Composition Techniques
There are lots of different ways that you can capture the forest in a camera. Here’s a few ideas:
Grandeur: Capture the size of the forest in all its glory. Showcasing towering trees, winding rivers and dramatic mountain backdrops.
Tiny details: Getting a closer look at those overlooked details of the forest. Learn more in our macro photography course for beginners.
The living forest: Wildlife is abundant in the forest, and you can capture them within their natural environment in the forest. Looking to find out more about wildlife photography? Discover how to photograph animals in woodland environments with our wildlife photography course.

Capture the grandeur of the forest. Pine Watt on Unsplash.

© Jack Lodge. Highlight tiny details of the forest floor by getting closer.

© Andy Rouse. Capture the thriving forest fauna. Taken from our Wildlife Photography Course.
Playing With Perspectives:
Worm's-Eye View: Get down low to the forest floor and shoot upwards. This can make trees look towering and majestic, and it can reveal interesting details in the undergrowth that you might miss from a standing position.
Bird's-Eye View: If possible, find a higher vantage point, like a hill or a sturdy tree branch (be safe!), to capture a unique perspective of the forest canopy. This can reveal patterns and textures that aren't visible from below.
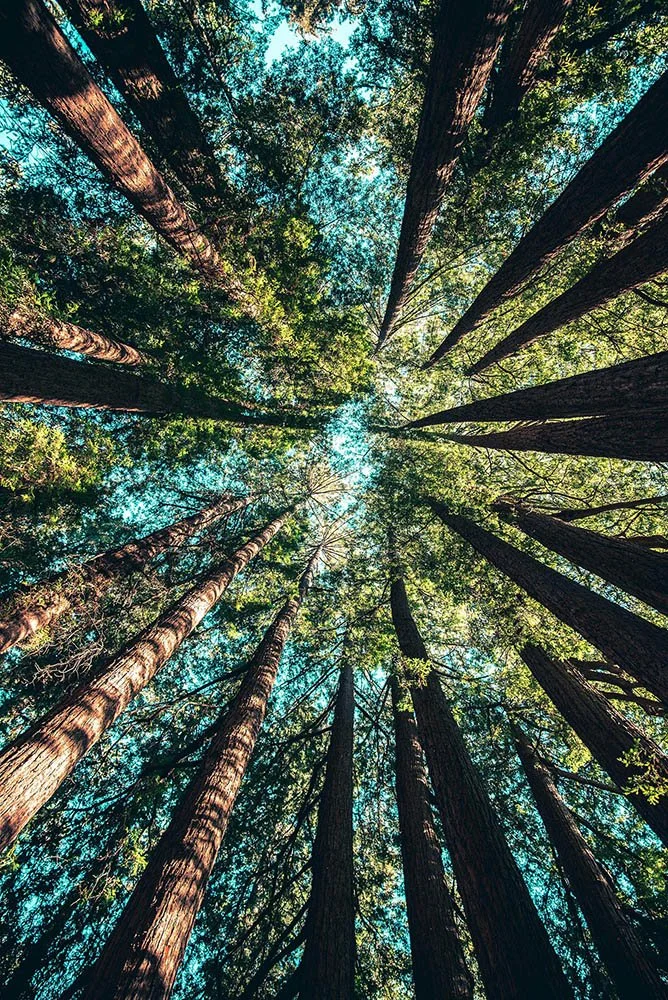
Worm’s eye view of the forest. Casey Horner on Unsplash.

Bird’s eye view of the forest. Christian Grab on Unsplash.
Incorporating Movement in Your Photography:
Long Exposures: Use a slow shutter speed and a tripod to capture the movement of water in a stream or waterfall. This creates a dreamy, ethereal effect. You can also use long exposures to blur the movement of leaves in the wind.
Want to master movement and water blur? Learn more in our long exposure photography course.
ICM: Intentional camera movement, or ICM, is a simple way to create abstract forest photography. We have a full tutorial on this effect, and you can read it here, but put simply, you create this by moving the camera while the shutter is open in one direction to create an interesting pattern with the resulting exposure.

© Jack Lodge. Long exposure can add drama to your forest photography.

ICM adds energy to your images.
Colour And Mood in Photography:
Vibrant Colours: Forests are full of rich, natural colours. Use the saturation and vibrance tools in your editing software to enhance these colours and make your photos pop.
Seasonal Changes: Embrace the different moods of the forest throughout the year. Capture the vibrant greens of spring, the warm hues of autumn, the stark beauty of winter, and the lushness of summer. Each season offers unique photographic opportunities.

© Jack Lodge. The vibrant colours of the woodland are always fantastic to capture!

© Jack Lodge. Capture the forest as it moves through each season.
Example images taken from our Forest Photography Course.
Forest Photography Editing Tips (Lightroom & Photoshop)
Editing your images in an important part of creating professional looking woodland photography. You can use post-processing software such as Photoshop, Lightroom or Gimp to enhance your photography images. Boost your editing skills further with our photoshop course.
Basic Editing Workflow:
Global Adjustments: Start by adjusting the overall exposure, contrast, highlights, shadows, whites, and blacks to ensure your photo is well-balanced.
White Balance: Use the white balance to change the atmosphere of the scene – want to really emphasise those warm, summery tones? Adjust the white balance to exaggerate the more orange and yellow tones in your forest photography.
Colour Grading: Working in tandem with white balance, you can enhance the natural colours of the forest using the HSL (Hue, Saturation, Luminance) panel or colour grading tools. You can also download and in one click apply our free forest photography Lightroom presets to give your photos a professional touch instantly – download them at the top of the page.
Advanced Techniques:
Focus Stacking: Want everything in your frame to be pin sharp? Try focus stacking. You’ll need to take multiple images for this and then edit them together when you’re editing.
Learn advanced sharpness techniques in our forest photography focus stacking course.
HDR (High Dynamic Range): Merge multiple exposures of the same scene to capture a wider range of tones, especially in high-contrast situations.
Want to find out more about HDR in Lightroom? Check out our tutorial.
Spot Healing and Cloning: Use these tools to remove distractions like dust spots or unwanted objects from your photos.
© Jack Lodge. HDR is great for high contrast situations to show a wide range of tones.

© Jack Lodge. Focus stacking lets you have pin sharp focus across your entire image.

Spot removal to remove distractions from your photograph.
Practical Tips For Forest Photography:
Capturing the forest can be a little bit challenging due to the terrain, so it’s good to consider these practical tips for working in a woodland environment. It goes without saying, it pays to be prepared when photographing on location!
Safety First:
It pays to be prepared when you’re out photographing in woodland terrain.
Tell Someone Your Plans: Always let someone know where you're going and when you expect to be back.
Stay on Trails: Avoid getting lost by sticking to marked trails.
Be Prepared for the Weather: Check the forecast before you go and dress appropriately. Bring rain gear, extra layers, and plenty of water.
Planning Your Shoot:

Know your location well when you’re photographing the forest, you want to scout the best places for shots!
Scout Locations: Visit potential shooting spots ahead of time to plan your compositions and determine the best time of day for lighting.
Research the Ecosystem: Learn about the plants and trees that inhabit the forest you'll be photographing during the time of year that you’ll be shooting it – certain plants will only appear at certain times of the year, and in certain places of the forest. Different types of trees will flourish and go brown at different times of the year. Researching this will help you anticipate what you might see and if there’s anything you should look to capture in particular!
Golden Hour and Blue Hour: Plan your shoots around the golden hour (the hour after sunrise and the hour before sunset) and the blue hour (the period of twilight when the sun is below the horizon but there's still enough light for photography). These times offer the most beautiful and dramatic lighting conditions.
Conclusion
Forest photography is a great way to connect with nature through your photography. With the right tools, techniques, and respect for the environment, you can capture stunning images that highlight the beauty and wonder of the forest.
We hope this guide has inspired you to grab your camera, head into the woods, and start exploring the endless possibilities of forest photography. Don't forget to experiment with our free forest photography Lightroom presets (download them by filling in the form at the top of this page!) to enhance your photos and share your creations with us on social media using #theschoolofphotography.
Happy shooting!
Continue learning with our photography tutorials for beginners, including landscape and camera fundamentals.


I hope you liked this blog ‘a beginner’s guide to forest photography’, if you did, please leave us a comment, and support us by sharing it with your friends and subscribe to our newsletter at the bottom of this page for more.
We also have an excellent learning community on social media so please join us there as well.
Thanks for watching and remember – Learn more at The School of Photography.
